
Java is a versatile language and is taught by many as an introductory language to coding. Coding in java can be interesting and fun. It can also be simple or difficult, depending on how complicated you want to make it. This makes java a beautiful language to start coding with. Java is a user friendly language that incorporates many techniques to increase ease and functionality for the coder.
Coding in Java
One of the ways that you can start coding in Java is by using an Integrated Development Environment (IDE). This gives you an application that you can run on your computer in which you can write, compile and run your code. I am going to describe and explain the differences between two IDEs, jGrasp and Eclipse, that I would suggest using so that you can decide which better suits your needs.
Why Should You Use jGRASP as an IDE for Beginners
jGRASP is an IDE that is great for beginners who want to learn how to code without taking any short cuts. I would actually suggest this to start because it gets you to code everything by not auto filling anything or pointing out specific errors while coding. It instead waits for you to compile the code and points you in the direction of the error making you, as the coder, find the specific mistakes yourself. This makes you a better coder by forcing you to debug (error check) your code yourself. It also makes you compile your code before you can run it.
Why is Eclipse a Better IDE for Intermediate Programmers
I prefer eclipse for an IDE because it has built in short cuts to make the programmers life easier. It also has a very pleasing design to its layout. Eclipse helps you along by giving you your base code and auto generating code by giving suggestions as you type for some types of code. It also has ways to auto generate code for more advanced use, which I will talk about in another post. Eclipse also compiles your code as you are typing allowing it to point out specific mistakes like a missing semicolon or the wrong type of bracket or an unclosed bracket. This makes it more ideal for someone who feels more confident in their coding ability but does not want to bother with the menial parts of coding.
Note Before Starting
Make sure to download latest version of java
Getting Started with jGrasp
You can download jGrasp here
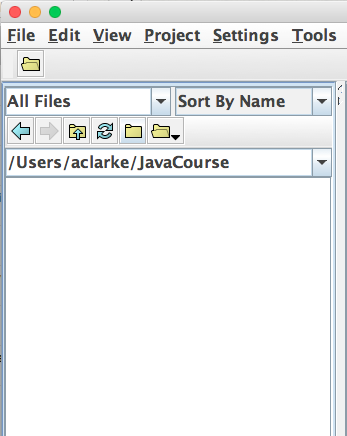
After downloading jGrasp and opening it up you should come to a screen like this:

First you want to create a new folder in which to save your files. You can do this by pressing the closed folder icon with no arrow:
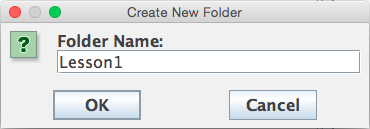
Once you have your new folder made, open it up.

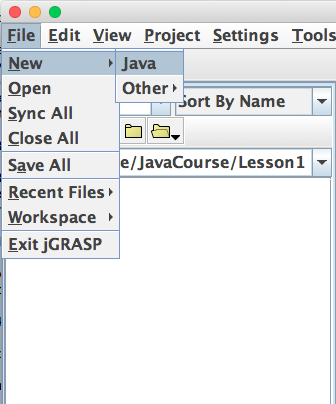
Now you will want to create your first java file. Do this by going into the file menu and choosing new->java like so:
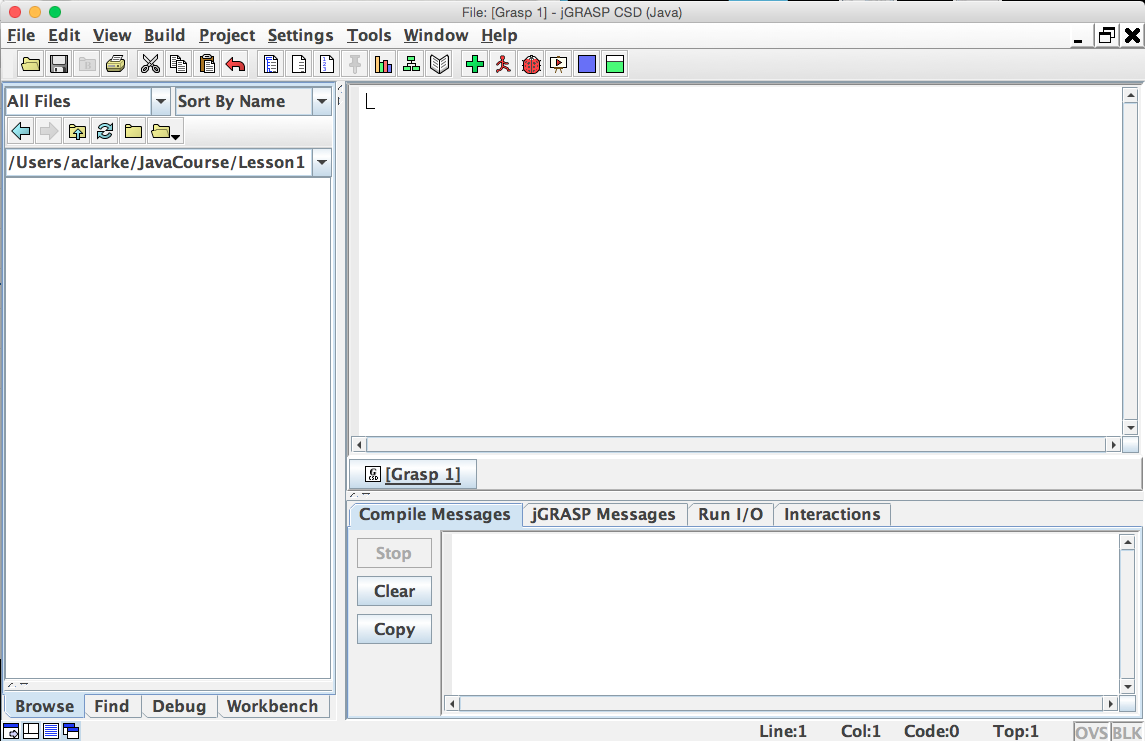
Notice that you now have a tab labelled [Grasp1]. This is your new untitled java file. In the blank space above the tab is where you can start coding.
Well almost. jGrasp does not provide this for you but you need the code below to actually run your code.
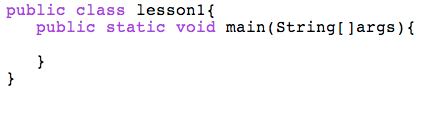
Note that “lesson1” is my name for the file. You will need to change that part to what you would like to name your file. Your code goes in between the inner set of brackets. With this code segment you are ready to start coding in java!
Getting Started with Eclipse
You can download eclipse here
Once you have downloaded eclipse. Run the program. This loading screen will appear if you are using eclipse kepler:

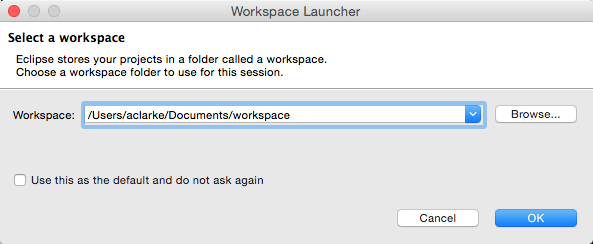
Once the program has started it will ask you to choose a workspace. This is where all of your code will be saved.
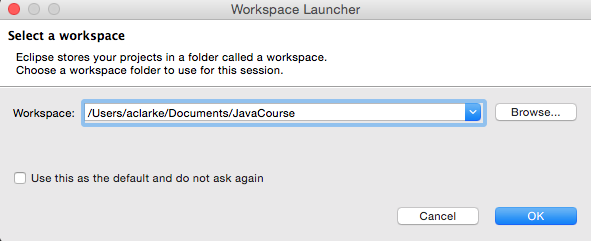
Once you have chosen a location this welcome screen will appear.
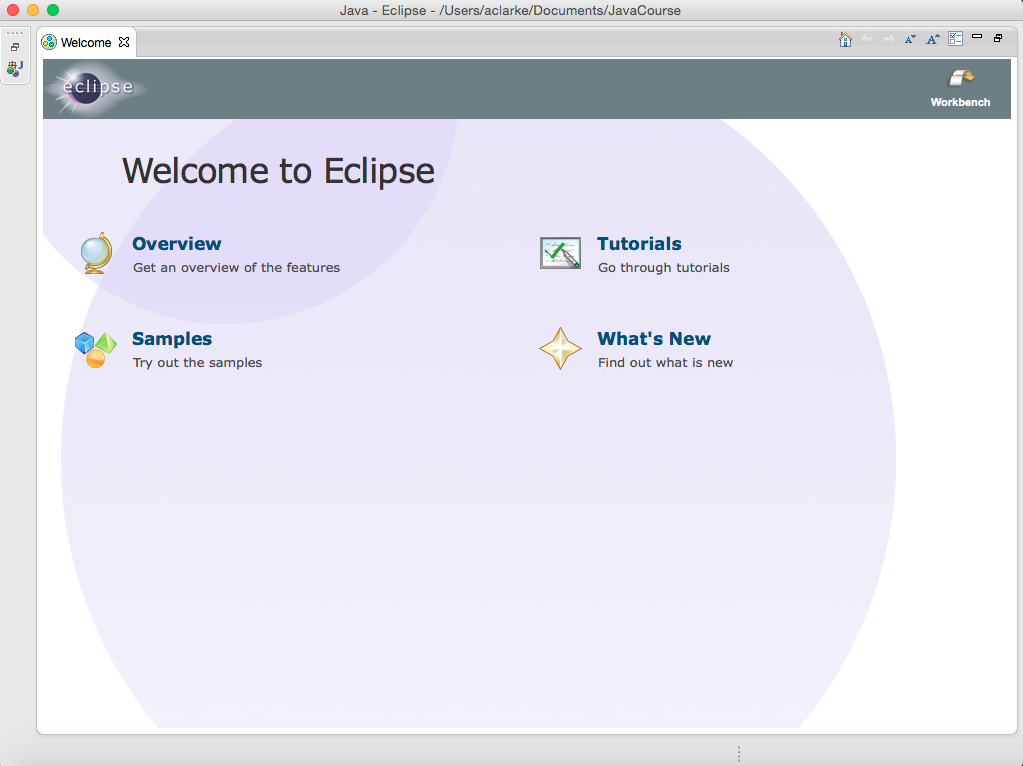
At this point if you wish to get an overview or do a tutorial on how to use the program you can or you can click the workbench button to start coding.
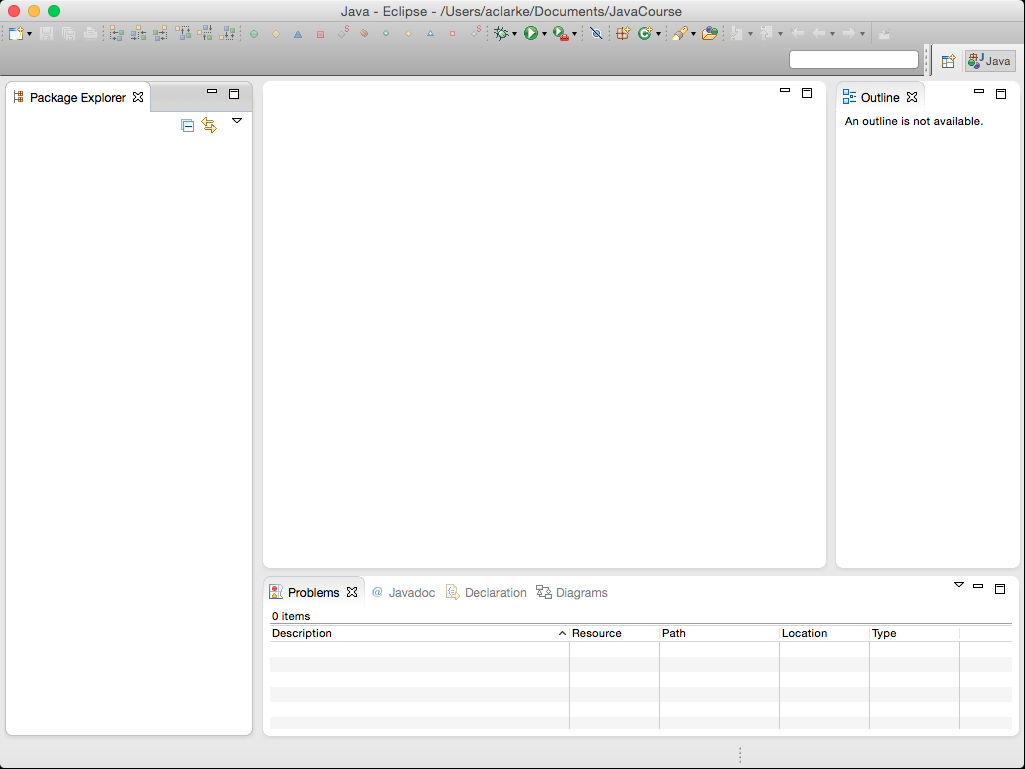
When you arrive at the workbench for the first time this is what it looks like:
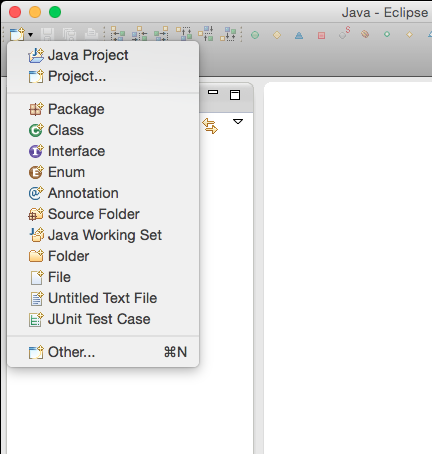
To start coding you need to first make a Java project you do this by selecting Java Project from the drop down menu.
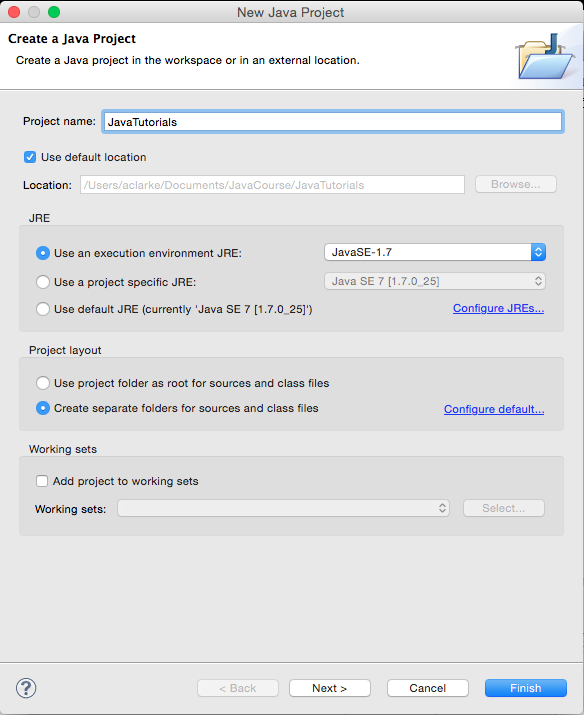
Once you have chosen to make a Java Project you must name it.
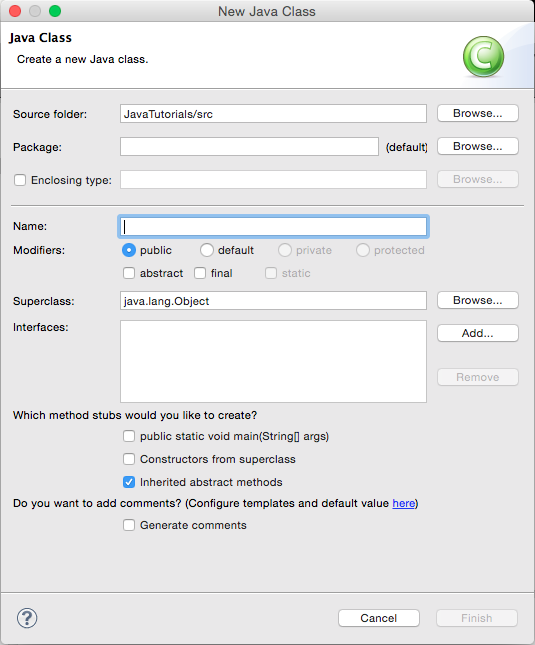
Then once you have a Java Project set up you can create a class. A Class is where your program exists and it is where you write your code. Do this by going back to the same drop down menu and selecting class. Once you have done this make sure you have the correct source folder. This will be the name of your new Java project followed by “/src”. This is what it looks like without me changing things:
This is after I have filled in my information:
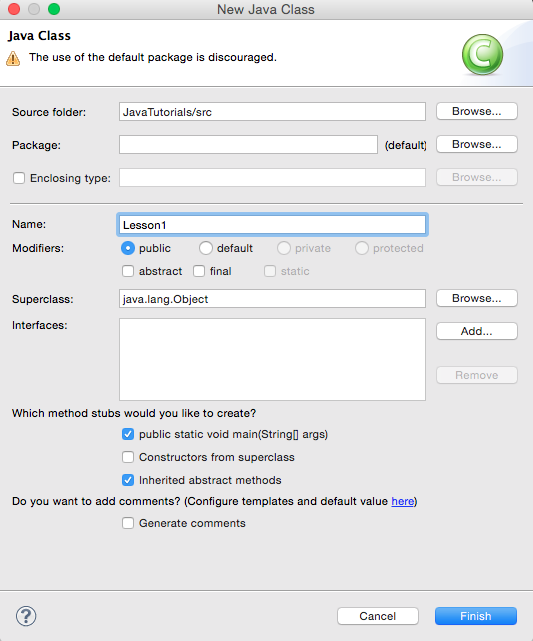
WARNING: The name of a class can not be changed so be sure to select a proper name for all of your files.
If you notice there is an option for eclipse to auto fill a main method for you. You can obviously choose to code it yourself but for simplicity lets choose this option. This is one of the many ways that eclipse uses to make the life of the coder easier.
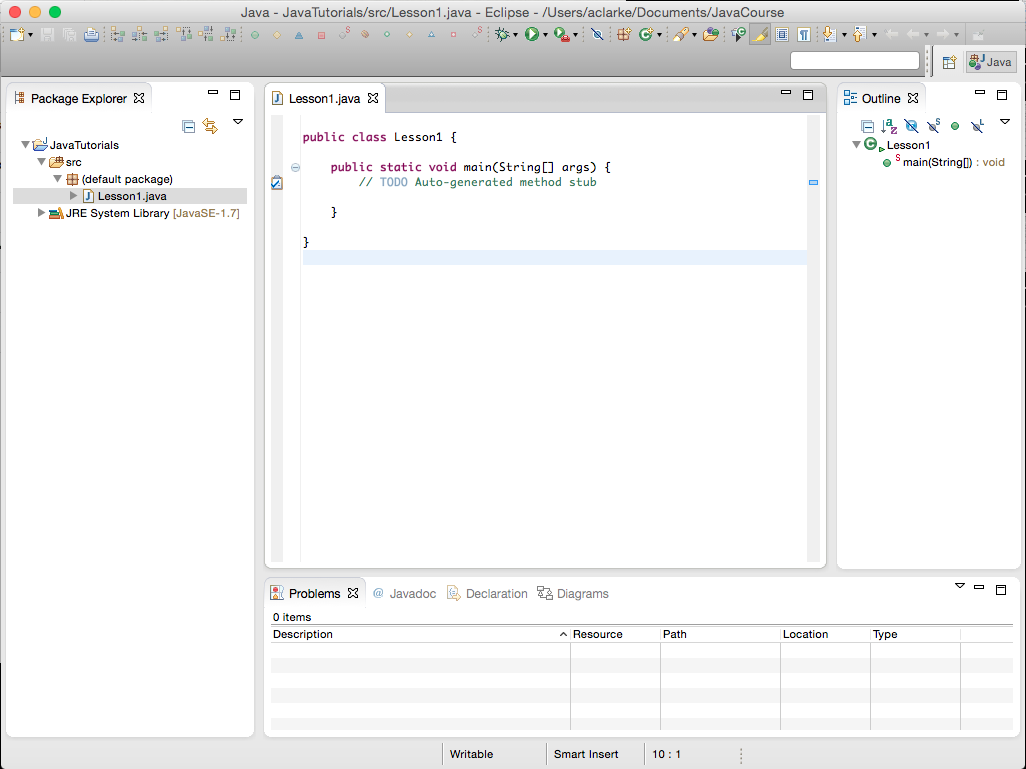
Once you have completed these steps and you have a screen similar to this, you are ready to start coding in java! Notice that there is a section below the main method, if you used the auto generate, with a bit of text preceded by “//”. By placing two slashes like so everything written to the right of it on the same line becomes a comment. Comments are not read by the program and are just there to help the programmer understand what is happening at each point. There a few types of comments which will be explained in another article. For now just know that it is a comment and that you can delete it if you wish.
Summary
Now you know that an IDE is an interface in which to code and you know of two IDEs. I am going to give a more in-depth explanation on how to use each IDE and how to code in a later post.